Noise pollution is a significant issue for many, especially those living in bustling cities, apartment complexes, or near busy streets. The ability to create a quiet, peaceful oasis within your home is a luxury that modern soundproofing materials can afford. Whether it’s the blare of a loud television from the next room, the incessant sound of traffic, or your noisy neighbour’s latest rendition, the right materials can make your dwelling a blissfully quiet haven.
Soundproofing isn’t just about maintaining a serene atmosphere in your living space; it also serves to increase privacy, enhance focus, and can even add value to your property. Homeowners, renovators, and those simply seeking a little tranquillity — this is your definitive guide to selecting the right materials for soundproofing.
Avoid the snags and pitfalls that come with uninformed purchasing and learn to create a soundproofing plan tailored to your home and your specific needs.
Assessing Your Soundproofing Needs
Before rushing to the hardware store, take a moment to evaluate your soundproofing requirements. Start with identifying the specific areas of your home that require soundproofing. Common spaces include walls between rooms, ceilings/floors, and windows — all areas where sound can infiltrate or escape.
The next step is gauging the level of noise reduction you need. Are you protecting against occasional loud sounds, like a dishwasher or washing machine? Or do you need to dampen constant traffic noise? Determining this will help you set a realistic goal for how much sound you want to block or absorb.
- Identifying the Source
Walk around your home and notice the areas where sound is most intrusive. Tap into the various household activities, and if possible, get a good sense of when the noise is most prevalent. Identifying these sources is crucial to understanding your project’s scope.
- Noise Level
Use your best judgment to decide how much sound reduction is necessary. Simple tests with a sound level meter or even basic smartphone apps can give you a numerical measurement of the noise level in decibels, offering a concrete starting point for your soundproofing project.
Understanding Different Soundproofing Materials
There’s no one-size-fits-all solution for soundproofing, but certain materials are widely used for their effectiveness. Here, we’ll cover the primary types and their applications.
- Mass-Loaded Vinyl
Mass-loaded vinyl (MLV) is a flexible and dense material that can be used in various ways. It’s often installed as a barrier between walls, under floors, or even wrapped around pipes to reduce noise transmission. Its mass and flexibility make it effective for maintaining structural sound integrity.
- Acoustic Panels
Acoustic panels, or sound-absorbing panels, excel in reducing echo and softening general noise. They are commonly seen in recording studios and home theatres but can also enhance the comfort of living spaces, especially rooms with higher ceilings.
- Soundproofing Foam
Soundproofing foam, also known as convoluted foam, is great for damping and absorbing mid to high levels of sound frequencies. It’s easy to install and can be a cost-effective means of soundproofing walls, ceilings, or doors.
- Green Glue
Green Glue is not a soundproofing material in the traditional sense but rather a unique adhesive that turns soundproofing construction materials — like drywall — into noise-reducing barriers. It’s typically used between layers of drywall, as a part of a ‘room within a room’ construction, which isolates sound vibrations.
- Bass Traps
Designed for low-frequency sound dampening, bass traps are triangular or box-shaped panels often installed in corners. They work best in conjunction with other acoustic treatments to balance out the absorption of a room.
Budget Considerations
Setting a soundproofing budget is critical, especially if you’re renovating multiple areas. Keep in mind that while certain materials may have a higher upfront cost, they could offer greater longevity and better performance. Here are some budgeting tips:
- Define Your Priorities
Rank the rooms or spaces in your home that need soundproofing from highest to lowest priority. Based on their necessity and daily activities, allocate a proportionate budget to each area.
- Long-Term Savings
Remember that investing in good quality soundproofing materials now might save you money on energy bills in the long run, thanks to better insulation qualities that can also improve thermal comfort in your home.
- Consider DIY Options
There are plenty of DIY soundproofing solutions that can be both cost-effective and highly effective, such as creating your own soundproof curtains or mounting soft furnishings.
Sourcing Your Materials
Now that you’ve identified your specific soundproofing needs and have a budget in place, it’s time to find the right materials. You have a few options for sourcing:
- Retailers
Visit your local home improvement centres, many of which offer a range of soundproofing products. Seek advice from in-store specialists, who can typically guide you to the most appropriate materials for your project.
- Online Stores
Alternatively, the internet is a treasure trove of options. Do a thorough search, compare prices, and read customer reviews to ensure the materials not only fit your budget but also meet your soundproofing needs.
- Specialised Suppliers
For high-quality or more specialised materials, seek out suppliers that focus specifically on soundproofing products. While usually pricier, these suppliers often offer a wider range and superior products.
Installation Guide
The installation process is where all the planning and purchasing come to life. Each soundproofing material will have unique installation requirements, but there are some general practices to keep in mind:
- Preparation
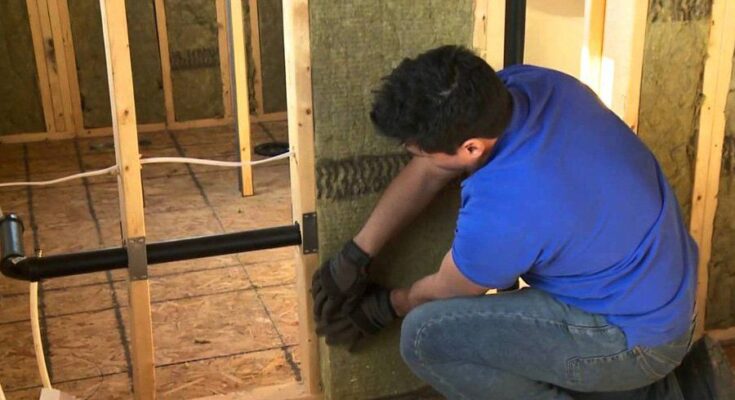
Ensure the area you’re soundproofing is clean and free from any obstructions. You may also need to prepare the surface according to the specific material’s requirements, which could include priming walls or cutting and measuring.
- Safety First
When working with materials that require cutting or tools, always prioritize safety. Wear the appropriate protective gear, use tools according to their instructions, and work in a well-ventilated area.
- Professional Help
For complex soundproofing projects, or if the sound transmission is a significant challenge, it might be best to hire a professional contractor. Professional installers have the expertise to handle any unforeseen issues and can ensure a job well done.
- Acoustic Testing
After installation, another sound test will be conducted to see how much noise has been reduced. Fine-tune your approach, making adjustments or additional installations as necessary.
Conclusion
Walking through the steps of soundproofing from assessment to installation, you’ve learned that a peaceful and quiet home is within reach. Remember that soundproofing is a process, and sometimes a room may require multiple methods to achieve the desired level of peace.
Enjoy the newfound peace and quiet that your soundproofing endeavours bring. Don’t be shy to share your successful soundproofing stories with friends and family or to provide feedback on the guide. Your experience can serve as a valuable lesson to others seeking sanctuary in their homes.


