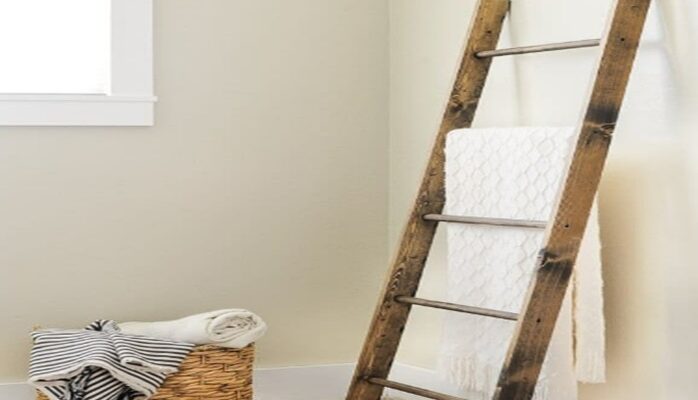
See how inexpensive and easy it is to create this trendy storage solution.
Hello! With crisp nights, changing leaves, and fresh air on the horizon, it’s the perfect time to cozy up and watch football under a blanket, don’t you think?
For this project, you’ll need blankets and a storage space for them. Keep reading to learn how to make a DIY blanket ladder using just a few materials and 2x4s. This ladder will hold all your fall blankets and can also be decorated with fall-themed decor. Let’s get started!
How to Make a Blanket Ladder
You will need the following to complete this project:
- 3 2×4 boards
- Miter saw
- Nail gun
- Two-inch nails
- Wood stain
- Wood glue
- Triangle
- Sander
- Sandpaper
- Tape measure
- Clamps
Step 1: Cut your wood.
Remember to exercise caution when working with power tools. Wear protective eyewear and use common sense. Build at your own risk.
You will need two 6-foot pieces to make the sides and five 18-inch pieces to create the rungs.
The bottom section of each 6-foot section should be angled at 10 degrees. This will ensure that your blanket ladder sits flush against the wall once you’ve finished.
Step 2: Sand your wood.
After cutting the wood, make sure to sand all surfaces. Pay special attention to the cut ends. If you desire a worn-out look, use the sander to round the sharp edges.
Step 3: Assemble your blanket ladder.
Next, use a tape measure to mark 12-inch increments on both sides of each 6-foot piece. These marks will indicate where you will nail the rungs.
Before nailing the rungs in place, apply a small amount of wood glue to each end. The wood glue will help hold your blanket ladder together once it dries.
It’s important to ensure that the rungs of your ladder are straight and level when it is leaning against a wall. This will allow you to place knickknacks and blankets on top of them, creating a neat and level appearance. When you nail the ladder rungs in, make sure they are at a 10-degree angle.
For this step, you can use the 2×4 scrap that was cut off in step 2. Use a triangle to wedge the scrap into place. This provides a quick way to achieve the correct angle without having to measure each rung individually. Then, use a nail gun to insert two or three nails at each end of the rung. Repeat this process for each rung.
Step 4: Clamp your ladder.
Use two large clamps to secure the items in place. Once you’ve done that, set them aside and wait! Your wood glue needs to dry for at least 24 hours.
Step 5: Stain (or paint) your ladder.
This is the step I like the most. The transformation is amazing and quick! Once your wood glue is fully dry, you can proceed to stain the blanket ladder.
Before staining, make sure to sand off any areas where the wood glue may have seeped out when you clamped the ladder. If there is any residue of wood glue, the stain won’t adhere properly.
The dark walnut stain gives a beautiful finish. Alternatively, you could paint your ladder if you prefer. A distressed painted ladder would also look great.
Since the stain I used was very dark, I only applied one coat. I used an old cloth dipped in stain and rubbed it until I achieved a smooth finish. Remember to wear rubber gloves when staining to avoid staining your hands!
Now it’s time to decorate your ladder. Add a wreath and a few other knick knacks. And of course, place a blanket on top!
This ladder gives my house a warm and cozy farmhouse feel.
Try this DIY blanket ladder today
You can create your DIY blanket ladder with a few simple supplies and some time (excluding drying time!) in less than 30 minutes.
Please note that this decorative blanket ladder is not intended to be used as a step ladder. It is designed solely for holding blankets. I’ve had my kids ask me about this before. While the wood glue may provide some strength, it is not meant to support significant weight or be used as a sturdy ladder.
This post was written by a professional at Greenbar Storage. Greenbar Storage has a wide range of storage units available in Prineville, Oregon. They offer a variety, including ground-level access, security cameras, 24/7 accessibility, and parking spaces. Locally owned and operated, we are the best choice for convenient and clean storage solutions in the Prineville, Oregon region. All of our commercial storage clients accept deliveries from businesses. Click here to learn more!


